Building ML datasets from email with Oxen.ai 🐂 📧
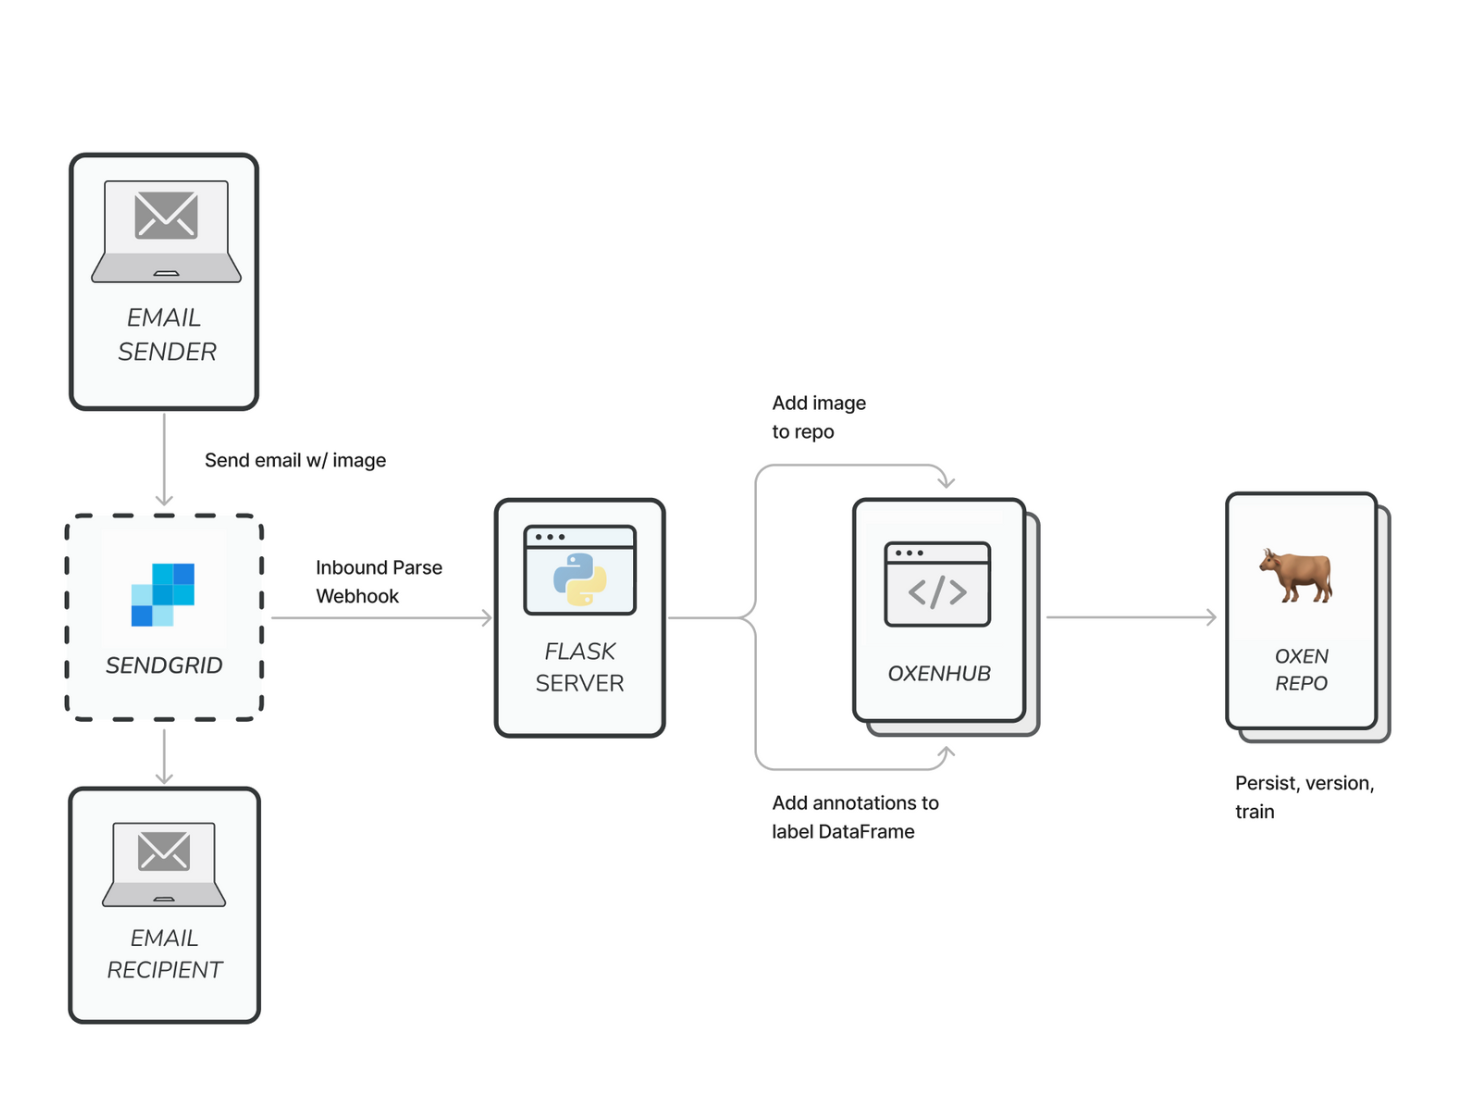
Making dataset management easier for all stakeholders
In a previous post, we showed how Oxen's Remote Workspaces radically simplify the process of contributing to shared datasets. There are many ways to integrate data with Oxen.ai—in this tutorial we show how to integrate email into a data collection process.
While a typical dataset contribution flows can look like this...
- Download massive .zip dump of dataset (often tens to hundreds of GB)
- Make any revisions or contributions locally
- Re-zip the data and find a way to transmit the new version back to the project owner
...Remote Workspaces allow you to skip steps 1 and 3, instead facilitating traceable, distributable, well-versioned changes to the data without downloading any data you don't need.
This is great, but it gets even easier!
With the oxenai python library, we can build integrations that make it easy for anyone in your organization to contribute to your datasets—no coding required. There's a world of possibilities here, but we're most excited about integrating with email and SMS APIs to make adding labeled, well-versioned observations from the field as easy as shooting off a quick text or email.
Let's dive in!
Building datasets via email using Oxen and Sendgrid
In this tutorial, we'll develop an Oxen x Sendgrid integration which will allow users to commit images to existing data repositories by sending an email.
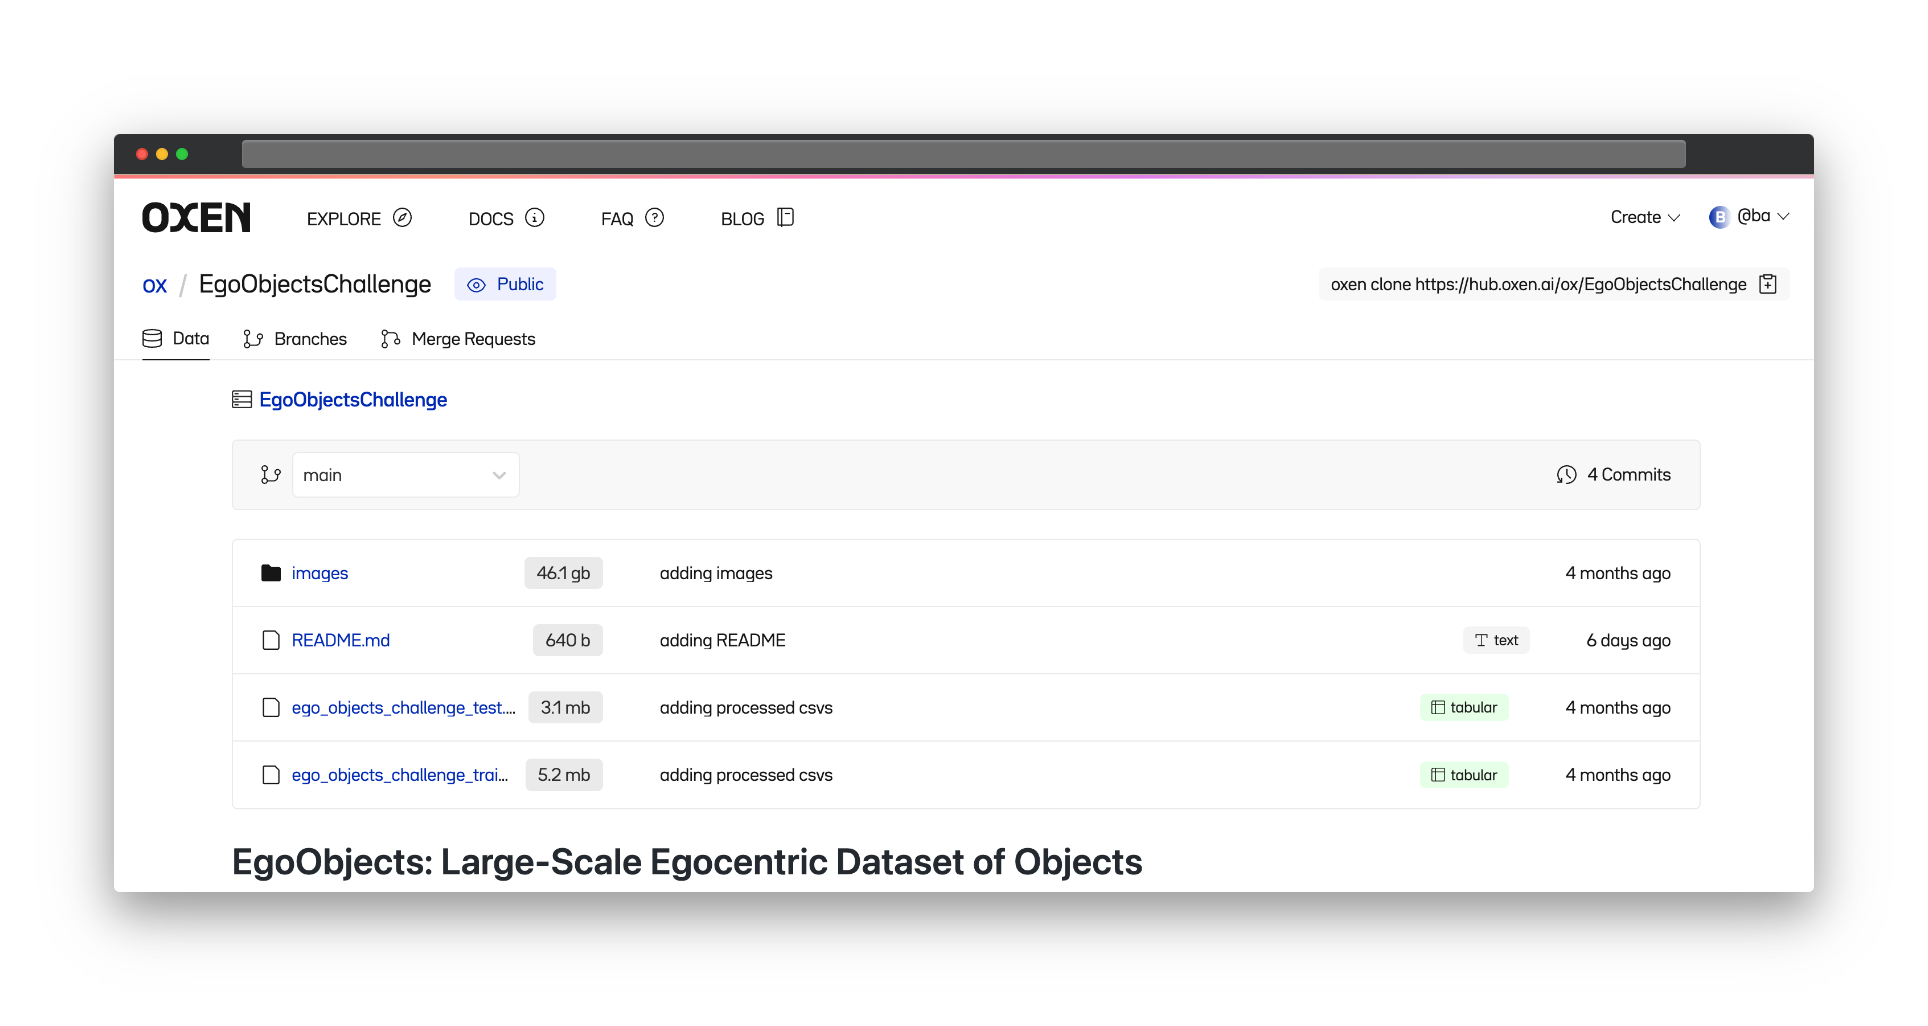
We'll use Meta's EgoObjects egocentric object detection dataset as an example.
Our integration will facilitate the following:
- Listen for emails on a specific subdomain. Parse their image attachments and remotely stage them for addition to an Oxen data repository as follows:
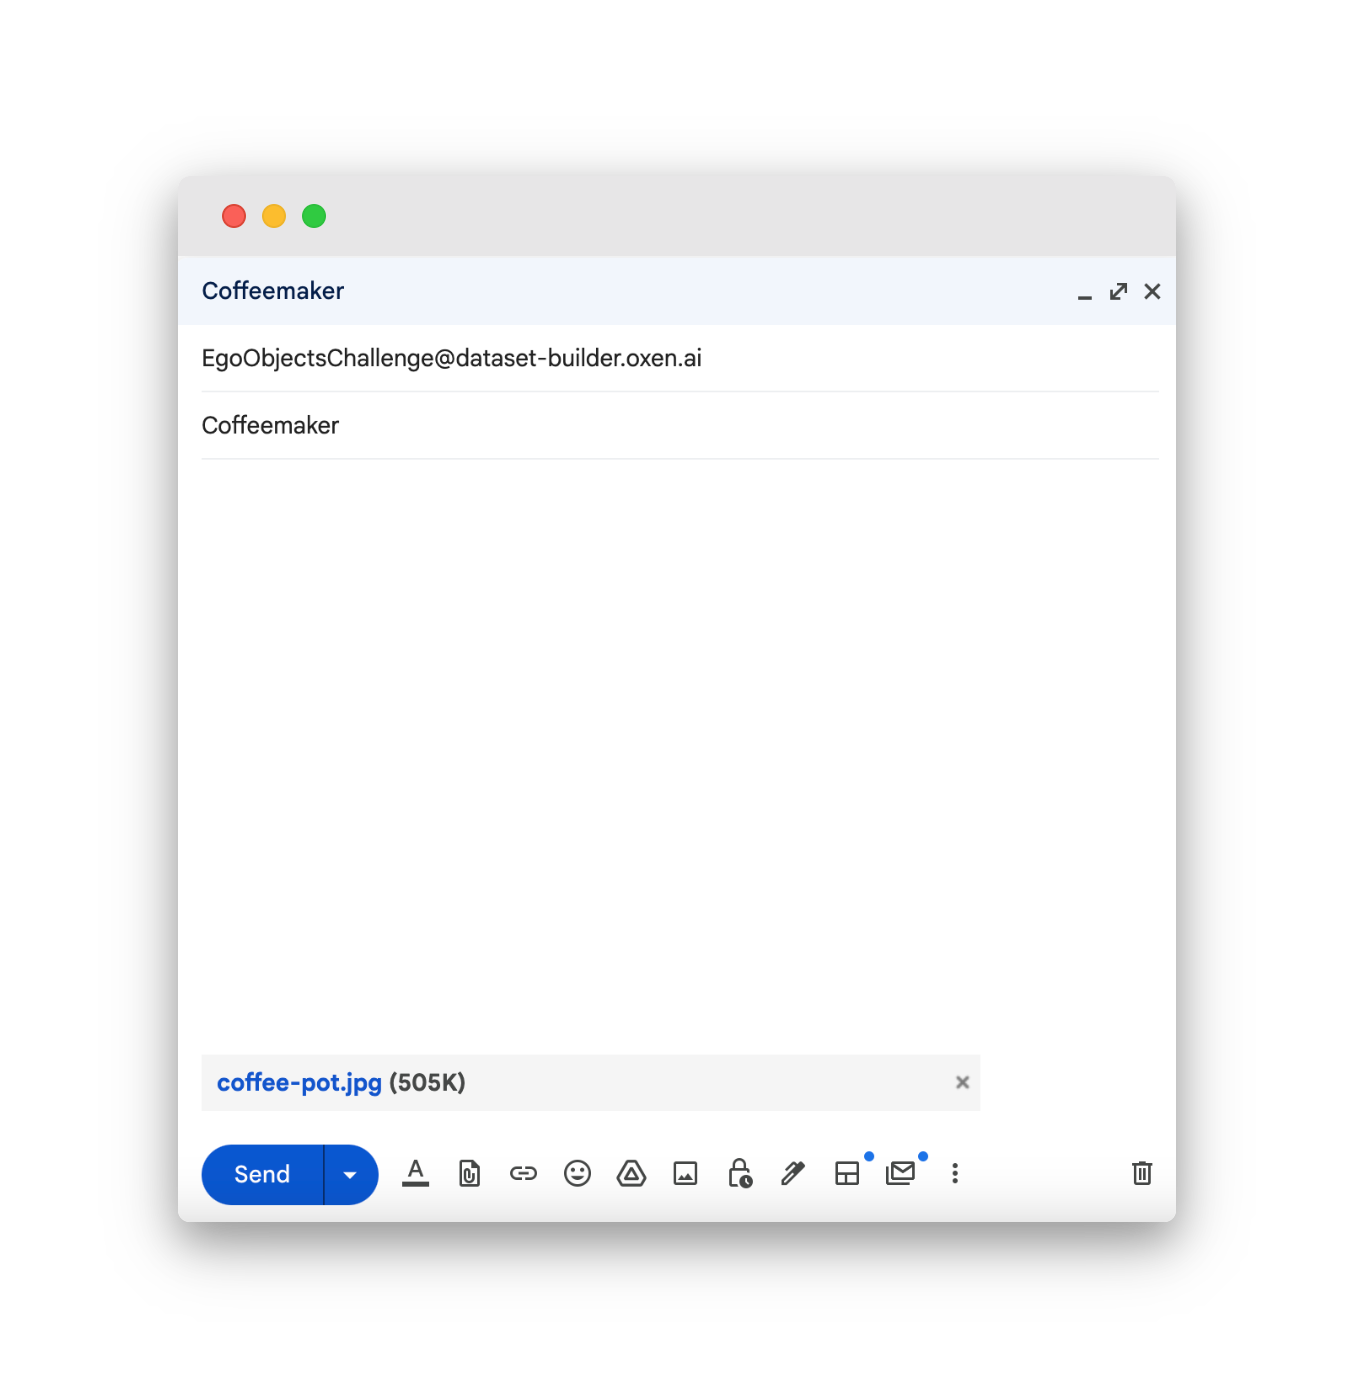
- Address (cat-or-dog@...) → Oxen repository name (
ox/CatOrDog) - Subject → class label (
catordog) - "From" address → contributor (for commit message and contribution history)
- Image attachment → file to be added to the remote training data folder in Oxen
- Address (cat-or-dog@...) → Oxen repository name (
- Append a row to our training labels file for each image added, including information about the image's new path in the repo, the image's class label, data added, and contributor
- Commit these changes to Oxen using Remote Workspaces
The result: one quick email creates a structured, validated, well-documented addition to a training data repository in a few seconds, even for massive, foundation-scale training datasets.
Getting set up
1: Authenticate with Oxen
Go to oxen.ai and create an account. After you’re set up, click Profile and copy your API key from the left sidebar.
You can then authenticate from any interactive python environment:
!pip install oxenai
import oxenai
import os

# Make oxen config directory
os.mkdir(f"{os.path.expanduser('~')}/.oxen")

oxen.auth.create_user_config("YOUR NAME", "YOUR EMAIL")
oxen.auth.add_host_auth("hub.oxen.ai", YOUR_OXEN_API_KEY)
2. Clone starter project and set up environment variables
Clone this GitHub repository, which sets up the core structure of our Flask email-parsing app.
git clone git@github.com:Oxen-AI/email-to-repo.gitHave a look around:
app.py- our Flask application to receive incoming emailsparse.py,config.py,send.py- boilerplate from Sendgrid (adapted from this module) to streamline parsing the inbound emailsconfig.yml- config file for our application variables
Configure application and environment variables
In a .env file in the root of this new email-to-repo project, set the following:
NAMESPACE=your-oxen-namespace
Explore and change any relevant application variables in config.yml. These include:
- Port to run Flask server on (default:
5002) - Oxen directory to write images (default:
images) - Oxen path to labels dataframe: (default:
annotations/train.csv)- Since the label file for
EgoObjectsChallengesits in the root directory atego_objects_challenge_train.csv, we set this variable accordingly.
- Since the label file for
- Branch: branch to commit to via email (default:
emails)
3. Start the project
Install dependencies, then start the app.
pip install requirements.txt

python app.py
For local testing and prototyping, we’ll use ngrok to create a public IP address through which our email client (SendGrid) can access our email parsing app.
Since the Flask app in the demo code defaults to port 5002, simply run:
ngrok http 5002If successful, you should see the following:
Session Status                online
Account                       <email>@oxen.ai (Plan: Free)
Update                        update available (version 3.3.0, Ctrl-U to update)
Version                       3.2.2
Region                        United States (us)
Latency                       24ms
Web Interface                 <http://127.0.0.1:4040>
Forwarding                    **https://<some-big-long-url>.ngrok-free.app** -> <http://localhost:5002>
The URL bolded above (under Forwarding) now forwards to port 5002 on your local machine, where your Flask app is running. We’ll give this address to Sendgrid in the next step, allowing their Inbound Parse Web Hook to forward incoming emails to your app.
4. Set up the SendGrid Inbound Parse Webhook
This integration uses SendGrid to track all incoming email at a specific subdomain.
Instructions here—three quick tips on setup:
- Once set up for a domain, traffic to any address at that domain will be routed to your Flask app. As such, we strongly recommend using a subdomain (we chose dataset-builder.oxen.ai) rather than adding it on the root (oxen.ai).
- Under “Destination URL,” enter your ngrok forwarding address from above, followed by the endpoint at which you’ll listen for the POST request (ex:, https://<some-big-long-url>.ngrok-free.app/add-image)
- Click the “Send Raw” checkbox under “Additional Options”
Once properly configured, this web hook will forward all incoming emails to <subdomain>.<your-domain>.com as POST requests to your newly running Flask server.
5. Commit data by sending an email
With the server running and SendGrid properly configured, we're ready to start contributing!
Using the EgoObjectsChallenge object detection data repository, we'll remotely commit our coffeemaker image with the following email:
After a few seconds, we can check the commit history in OxenHub:
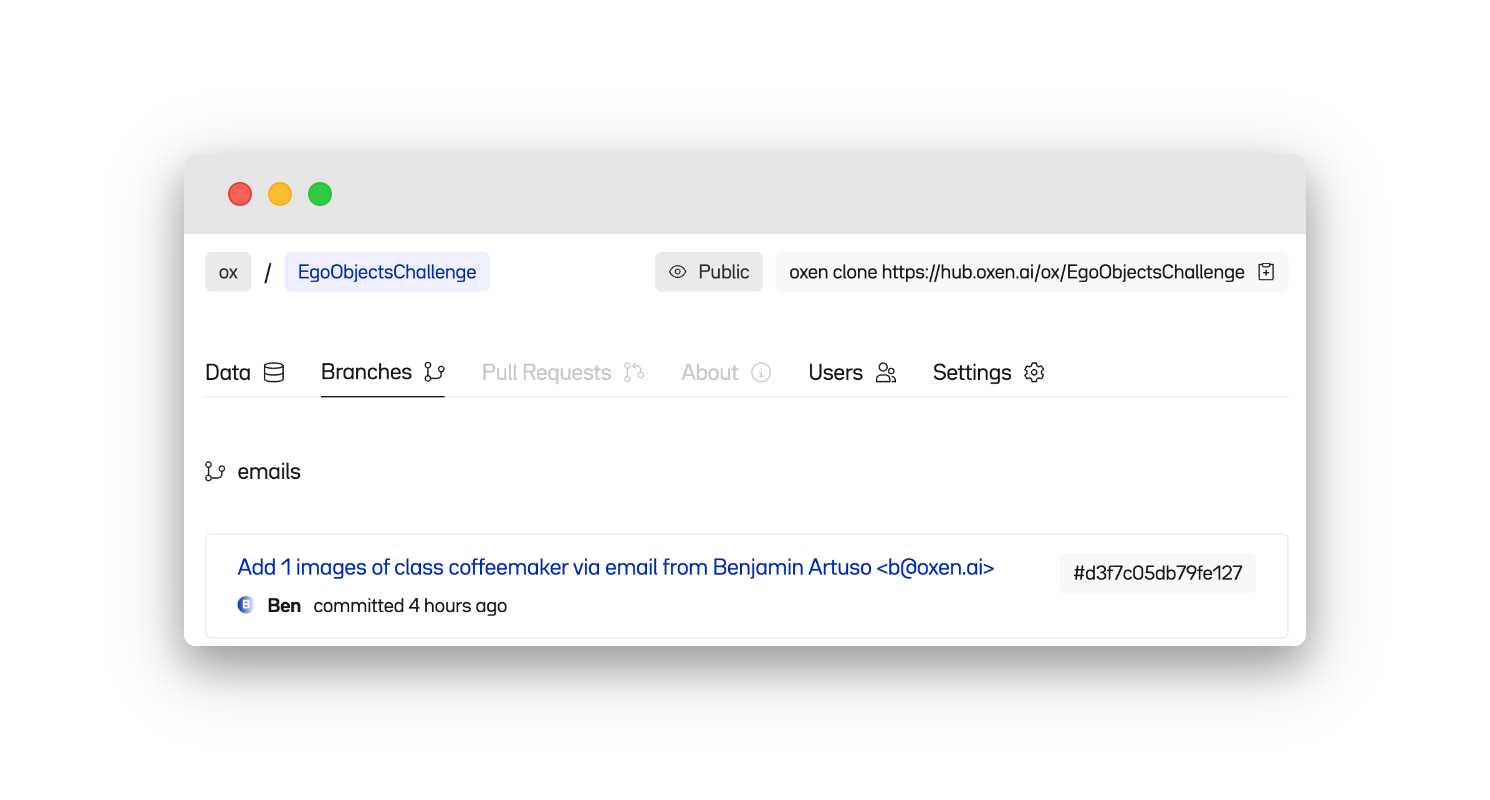
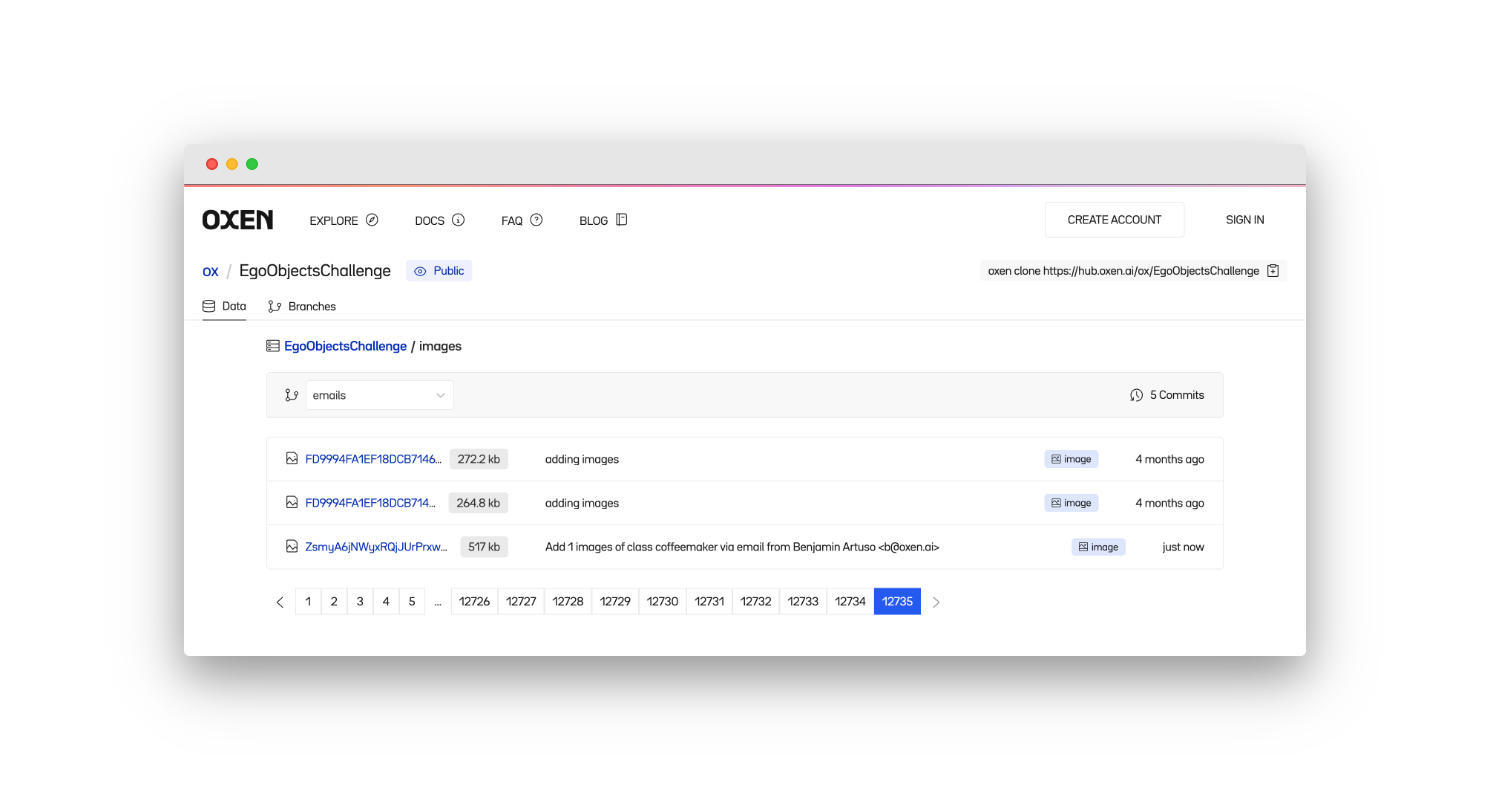
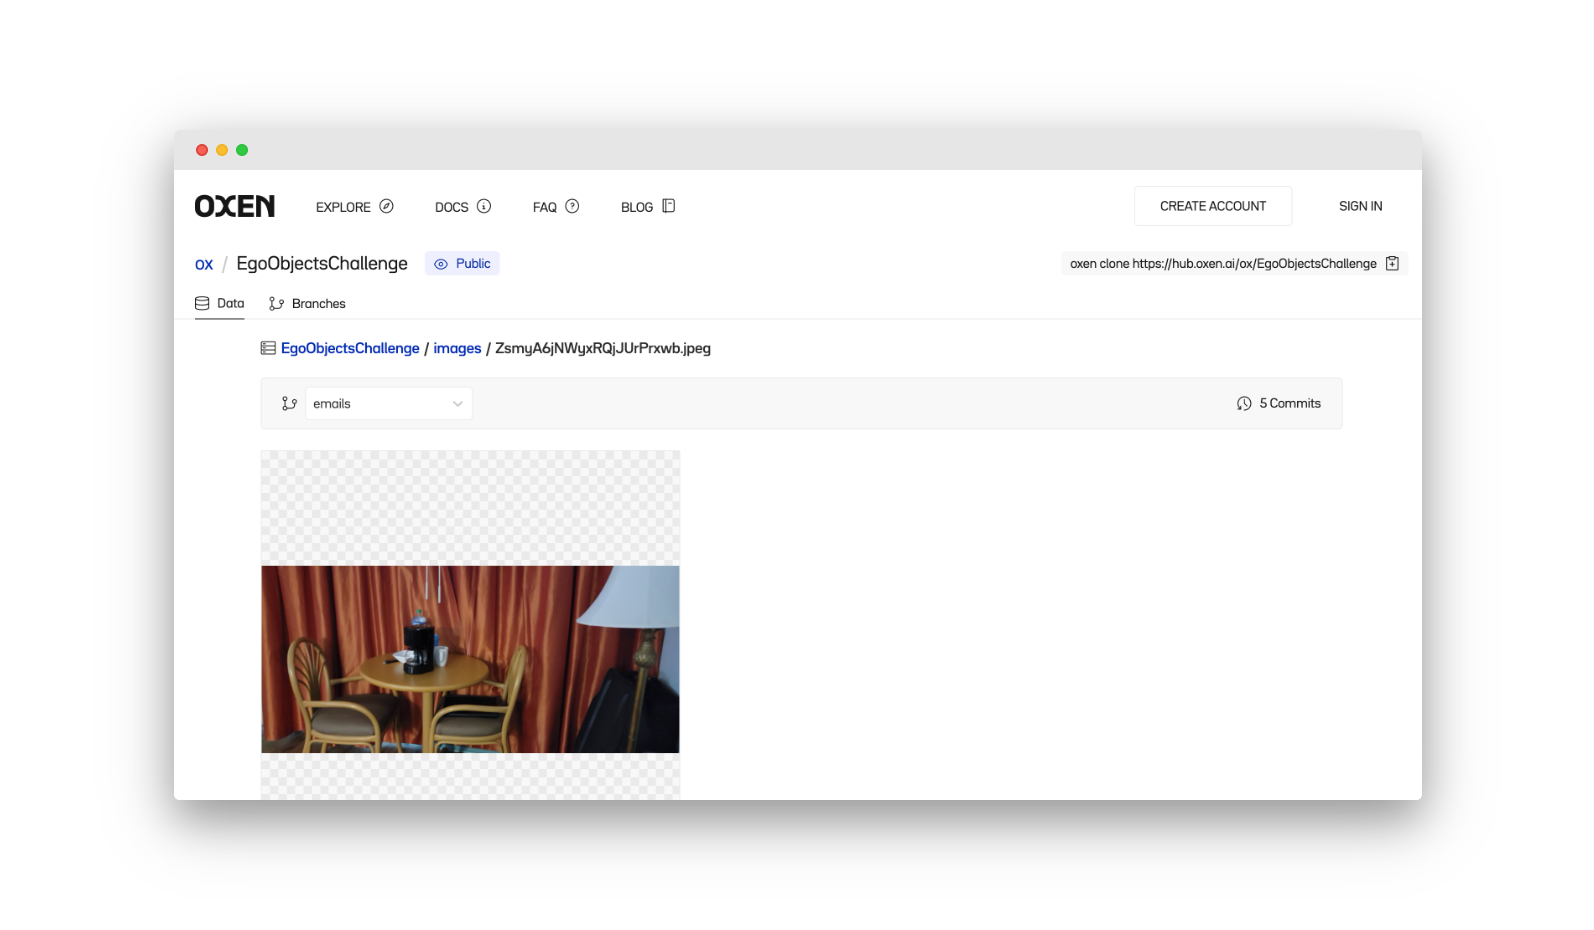
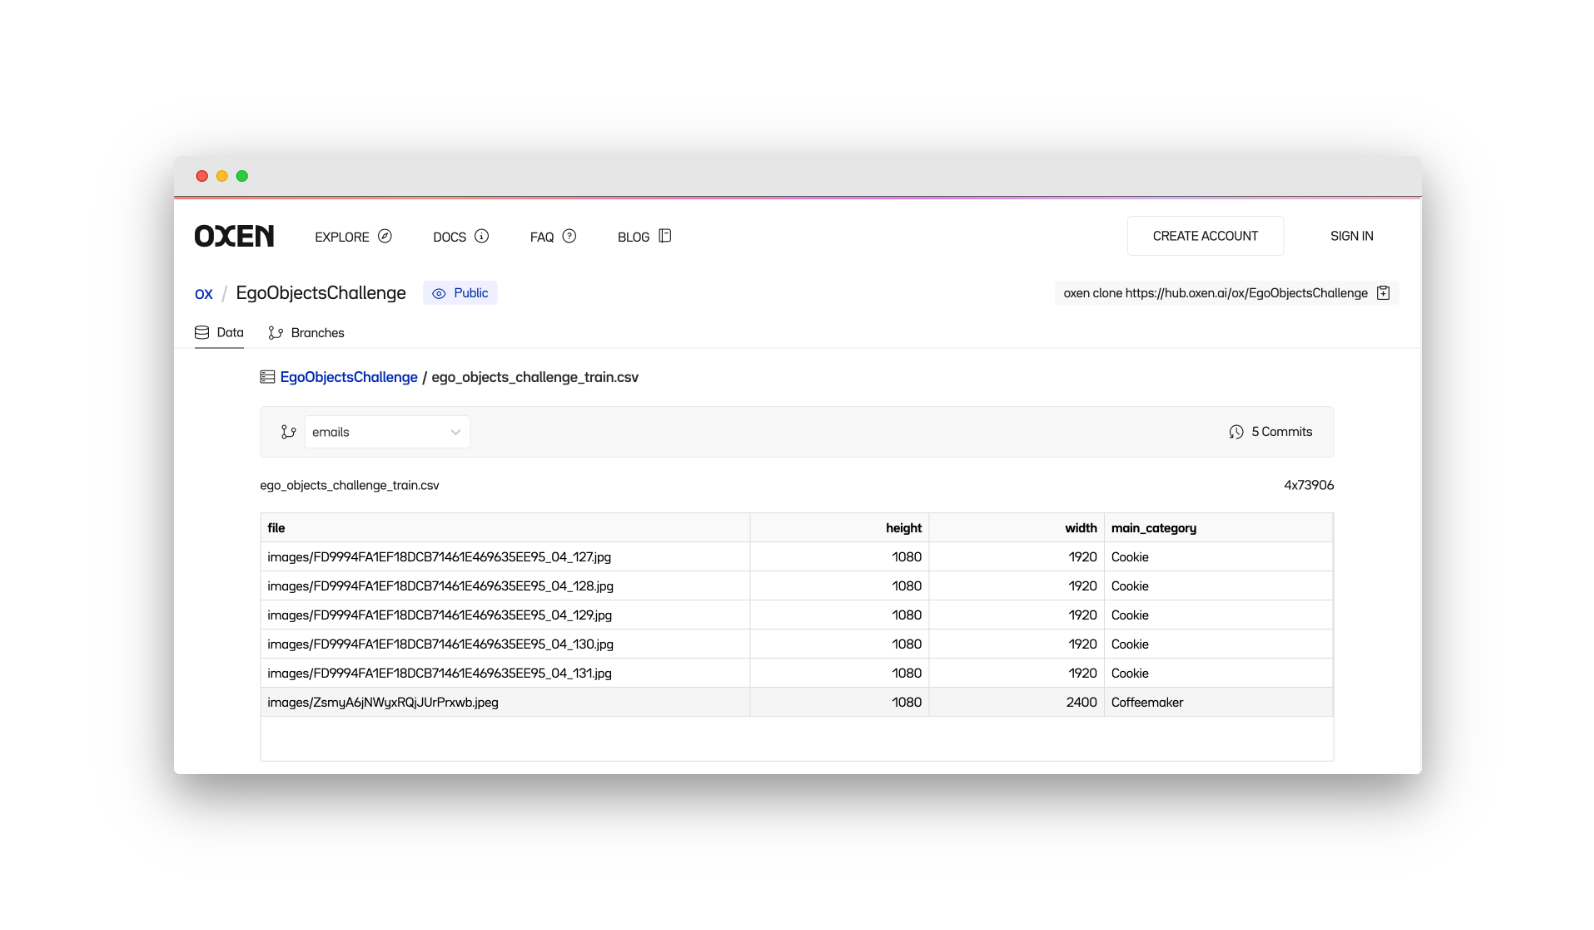
Ta-da! 🎉 Not only has the file been added to our imagery directory, but a row has been appended to our labels file containing parsed and computed metadata about our newly added image, including its dimensions, filepath, and class.
So how does it work?
Sending an email to any address at our specified subdomain triggers the inbound parse web hook, which sends a request to our /add-image route.
Upon receipt, we first use the Sendgrid helper modules to parse it into a key-value format.
# Parse email into sendgrid Parse object
parse = Parse(config, request)
We then iterate over the attachments in this email object, saving all images to a temporary local directory.
While we generate unique identifiers for the new file names to avoid collisions (i.e., two different contributors sending in dog.jpg), the filename from the email attachment could instead be mirrored if it’s a meaningful deduplication key (i.e., a plot or sample number in remote data collection).
for attachment in parsed_email.attachments():
        if attachment['type'] in ['image/jpeg', 'image/png']:
            mdata = base64.b64decode(attachment['contents'])
            target_fname = config.temp_image_folder + "/" + str(shortuuid.uuid()) + '.' + attachment['type'].split('/')[1]
            with open(target_fname, 'wb') as f:
                f.write(mdata)
            fnames.append(target_fname)
With our images saved and ready for upload, we use the Oxen RemoteRepo python object to easily stage our image files and the associated metadata.
First, parse the repo name, class label, and contributor from the email object:
params = {}
params['repo'] = parsed_email.key_values()['to'].split('@')[0]
params['label'] = parsed_email.key_values()['subject'].lower()
params['contributor'] = parsed_email.key_values()['from']
Initialize a connection to a remote oxen repo and checkout the target branch:
repo = RemoteRepo(f"{os.getenv('NAMESPACE')}/{params['repo']}", config.remote_host)
repo.checkout(config.branch)
For each image file:
- Assemble a metadata dictionary corresponding to the label schema on the remote annotations file (file, width, height, main_category)
- Add the image file to the remote workspace
- Add the metadata row to the label DataFrame
for file in files:
	  metadata = { # 1
	      "path": f"{config.image_directory}/{file.split('/')[-1]}",
	      "label": params['label'],
	      "contributor": params['contributor'],
	      "added_at": datetime.datetime.now().strftime("%Y-%m-%d %H:%M:%S"),
	  }
	  repo.add(file, config.image_directory) # 2
	  repo.add_df_row(config.label_path, metadata) # 3
When finished, commit the data to the repo!
repo.commit(f"Add {len(files)} images of class {params['label']} via email from {params['contributor']}")
Wrapping up
Oxen’s Remote Workspaces and python library enable easy, lightweight contributions to some seriously heavyweight datasets. There’s potential for a wide array of integrations here beyond just email, from SMS-based repo management to real-time collection of human feedback from chatbot interactions.
We’d love to see what you build with these tools! Reach out at hello@oxen.ai, follow us on Twitter @oxendrove, dive deeper into the documentation, or Sign up for Oxen today.
If you like what we're building, feel free to give us a star on GitHub ⭐—for every star, an Ox gets its wings!

